If you’ve ever fumbled with a wobbly filing cabinet drawer that keeps popping open when you slide the cabinet around, or worried about sensitive client documents, employee files, or even personal valuables getting accessed by unauthorized people, swapping or installing a drawer lock is way easier than it sounds. As a drawer lock supplier, I see so of folks skip this step because they think it’s a big, complicated project—spoiler alert: it’s not. Most of the time you can do it in under an hour with basic tools, no fancy experience needed. I’ll walk you through exactly what to do, what tools you’ll need, and even a few pro tips I’ve picked up from years of answering questions from office managers, small business owners, and even people fixing up their home offices. Drawer Lock
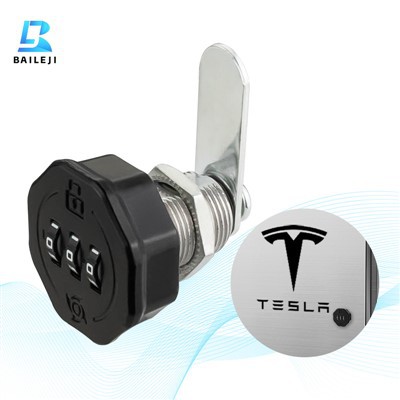
First, let’s get the basics straight: when we talk about filing cabinet drawer locks, there are two main types you’ll run into. The first is a retrofit lock, which is made to replace an old, broken, or missing lock that’s already in your drawer. The second is a new installation, for when you’re working with a brand-new drawer that never had a lock at all. I’ll cover both, but let’s start with the tools you’ll need for either job because that’s where most people stall before even starting. No, you don’t need a workshop full of tools—just a Phillips-head screwdriver (the one with the cross-shaped tip), a flat-head screwdriver (the thin, small one, not the big one you use for painting), a tape measure, and a drill with a 1-inch or 25mm drill bit (most drawer lock kits come with this, but it’s good to confirm). If you don’t have a drill, a small flat-head screwdriver and a little elbow grease work for smaller jobs, but a drill makes it way faster and cleaner. Also, grab a rag to wipe up any metal shavings when you’re done—those tiny bits are sharp and can scratch your desk or cabinet finish.
Let’s start with replacing an old lock, since that’s way more common. First, empty the drawer. I know, you don’t want to move all those folders, but you have to—you can’t access the back of the lock plate if there’s stuff piled up. Slide the drawer all the way out, and there’s almost always a stop at the back rails that you have to press to release it. Just tip the drawer a little, press that little plastic or metal tab, and it slides right off. Set it somewhere flat so nothing falls out. Now, look at the old lock from the inside of the drawer (you’re looking at the back of the lock plate that’s on the front of the drawer, right? That makes sense). There are two small screws holding the old lock in place. Most of the time, those are Phillips-head, so grab your screwdriver and unscrew them. Once you take those out, the old lock should slide right out from the front of the drawer. Sometimes they’re a little stuck—give them a gentle tug, not too hard, and they’ll pop out.
Now, prep the new lock. If it’s a retrofit lock, it should fit exactly into the same hole the old one left, which is why retrofit is popular. But double-check: hold the new lock up to the old hole, make sure the tabs on the back of the lock line up with the slots in the drawer’s front. If it’s a new installation (no existing hole), skip to the next part. For retrofit, once it lines up, push the new lock into the hole from the front, then go back to the inside of the drawer. You’ll have two new screws (most kits come with them) that you screw back into the same holes the old screws came out of. Don’t over-tighten them—you don’t want to crack the plastic drawer front or strip the screw holes. Once they’re snug, test the key: insert it, turn it a few times, make sure it locks and unlocks smoothly. If it sticks, loosen the screws just a tiny bit, adjust the lock until it moves freely, then tighten them again. That’s it for replacing an old lock—super straightforward, right?
Now, what if you’re installing a lock on a brand-new drawer, or one that never had a lock before? This is where a drill comes in, and it’s still easy. First, measure where to drill the hole. Most filing cabinet drawers have a standard mark for locks—1.5 inches (or 38mm) down from the top edge of the drawer front, and centered horizontally. If you’re not sure, set the lock on the front of the drawer, hold it up so it looks level, and mark the spot where the keyhole is with a pencil. If your drawer has a handle, you can align the lock so it’s either above or below the handle, just make sure it’s not too close to the edge—you want at least an inch of space on both sides so the lock doesn’t pull off.
Once you mark the spot, clamp the drawer front (or just hold it steady if it’s small) so it doesn’t move when you drill. Put your drill bit in, make sure it’s the right size (your lock kit will tell you—usually 1 inch or 25mm), and drill straight through the drawer front. Don’t drill at an angle, that will make the lock fit wrong. Take it slow, especially if your drawer is metal—metal shavings are hot, so don’t press too hard or you’ll burn the edge. Once you drill through, wipe away the shavings with your rag. Now, take the lock, and feed the spindle (the little metal rod that comes out the back of the lock) through the hole you just drilled. The spindle is what connects to the latch mechanism inside the drawer, right? So you need to make sure it lines up. If your kit comes with a latch, slide that onto the spindle from the inside, then screw it in place. Again, don’t over-tighten. Test the lock here: turn the key, make sure the spindle turns smoothly, no grinding or sticking. If it’s not turning, check if the spindle is too long, or if the latch is misaligned—you can trim the spindle with a pair of wire cutters if it’s too long, that’s a common fix.
Wait, let’s talk about a common mistake people make when installing new locks: forgetting to check the latch alignment. A lot of folks drill the hole and stick the lock in, but if the latch doesn’t line up with the slot on the cabinet frame, the drawer won’t lock closed properly. After you install the lock, slide the drawer all the way into the cabinet, turn the key to lock, and make sure the latch pops into the slot. If it doesn’t, you might need to adjust the lock—loosen the screws a little, shift the lock left or right, then try again. That’s a 2-minute fix, no need to drill a new hole.
I also have a few pro tips from being a drawer lock supplier, because I’ve seen all the mess-ups. First, always test the key twice before you put the drawer back. Nothing’s worse than getting it all installed, sliding the drawer in, and realizing the key won’t turn. Most lock kits come with two keys, so use the spare one to test too—sometimes a new key needs a little jiggle to work, especially if it’s a keyed alike set for multiple drawers. Second, if you’re working with a metal cabinet, get a metal drill bit—regular wood bits will bend or dull on metal, so that will save you a trip to the store. Third, if your drawer front is thin, don’t over-tighten the screws—you can crack the plastic or metal, and that’s a big headache to fix. Most kits have small screws for a reason, so snug is better than tight. Fourth, if you have multiple drawers in a cabinet and want all the locks to use the same key, ask for a keyed alike set when you order—way easier than having 3 or 4 different keys to keep track of.
Wait, what about if the lock is sticking after installation? That’s usually either a tiny metal shaving stuck inside the lock, or the spindle is a little misaligned. Take a can of compressed air (or even a straw to blow) and blow out any shavings from the keyhole, then put a tiny drop of graphite lubricant (never use oil or WD-40, that will gunk up the lock) into the keyhole. Turn the key a few times, and it should loosen up. That’s way cheaper than replacing the whole lock.
Another thing: if you’re retrofitting a lock on an old wooden drawer, sometimes the old hole is a little bigger than the new lock. No problem—most retrofit locks come with little plastic inserts that fill the gap, or you can use a small amount of wood glue to shim the sides before pushing the lock in. Just wipe up any excess glue right away so it doesn’t get on the front of the drawer.
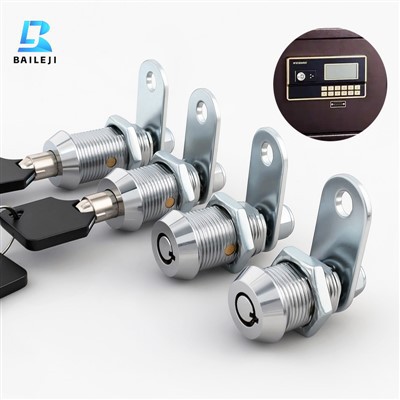
Now, let’s wrap this up. Installing a filing cabinet drawer lock isn’t intimidating. It’s 10 minutes of prep, 15 minutes of work, and 5 minutes of testing, and it gives you so much peace of mind for whatever you’re storing in those drawers. If you’re planning to order locks for your home office, small business, or even a whole office building, I’ve got you covered. We have all types of drawer locks—retrofit, new installation, keyed alike, even heavy-duty ones for metal cabinets. We offer bulk pricing for offices, fast shipping, and all the tools you need if you don’t have them on hand. Whether you’re replacing a broken lock or adding one for the first time, we can hook you up with the right product and answer any questions you have mid-install. Don’t let a broken or missing lock leave your sensitive stuff unprotected—reach out to our team to talk through your needs, place an order, or get tips specific to your cabinet type. I’ve spent years helping people with this exact job, so we’ll make sure it’s done right the first time.
Tubular Lock References:
- "Office Furniture Hardware Installation Guide", National Hardware Association, 2022.
- "Drawer Lock Installation Best Practices", Locksmith Ledger, Vol. 68, No. 4, 2023.
- "Residential and Commercial Office Storage Solutions", Small Business Administration Office of Entrepreneurship, 2021.
Suzhou Baileji Intelligent Lock Industry Co., Ltd.
As one of the most professional drawer lock enterprises in China, we’re featured by quality products and good price. Please rest assured to buy discount drawer lock in stock here and get pricelist from our factory. Also, customized service is available.
Address: 3rd Floor, Building 9, Shengteng Industrial Park, No. 8 Ruyuan Road suzhou, jiangsu, China
E-mail: vip@bailejilocks.com
WebSite: https://www.bailejilock.com/
